
All right, picture this…you’ve carefully arranged your discussion groups ahead of time. You’ve balanced your chatty adult ESL students with the quiet ones, mixed high and low levels thoughtfully, and you’re feeling so good that you gave yourself a literal pat on the back.
Overconfident much? (I was.)
Class starts. You look around and realize three students are absent. So, you mentally reshuffle everyone, move people to different groups, and they finally settle in.
Then Hamad walks in twenty minutes late. Of course he does.
And he’s supposed to be in Group 3, which you had ALREADY reorganized to account for his absence. So now you have to reshuffle everyone AGAIN, and students are giving you that look because they JUST got comfortable, and now? You’re making them move.
You’ve been there, right?
Why is grouping students so ridiculously difficult?
Here’s the thing. If you wait until after class starts to create discussion groups, students have already claimed their territory. Try moving them after they’ve settled in and you’ll get sighs, dramatic eye rolls, and that one student who acts like you’ve asked them to relocate to another country.
But making groups ahead of time? That’s when you discover that half your carefully planned discussion groups are useless because students are absent, or you have two surprise new students, or someone switched sections overnight and nobody told you.
And then…THEN…after you’ve rearranged everyone to accommodate the absences, that student you thought was gone walks in 15 minutes late.
I probably should have invested in a stress ball, but at that point, I would have preferred to sit inside one and scream.
So, I created a system that gets the job done that you can use too!
For all the above reasons (and my sanity), I sat myself down and created a grouping system that, sure, took some initial prep work but made my life SO much easier for the rest of the term.
No more mental gymnastics or awkward reshuffling. No more pretending I have this under control while secretly panicking. Secretly? Ha. The red sweaty face was always a giveaway.
Anyway, here’s how it works.
Grab some colored paper (or markers, if you prefer)
I cut out slips of paper in four different colors and assigned each color to a type of student.
For example:
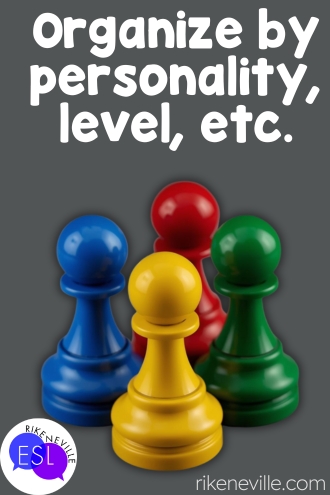
Option 1: By personality
- Yellow—very talkative
- Green—somewhat talkative
- Red—shy and quiet
- Blue—unknown/varies
Option 2: By level
- Yellow—high level
- Green—medium level
- Red—low level
- Blue—unknown/varies
That blue category? That’s your failsafe. That’s for the inevitable new student who appears out of nowhere past the midpoint of the term.
Don’t want to buy colored paper just for this? Use different colored markers or pens to write names on plain white paper. This works just as well, even if it’s not quite as visible when students are scanning for their group.
Figure out who goes where
Create a simple chart with those four colors as column headings.
Then divide your class as equally as possible across the colors. Don’t overthink it. You know who the talkers are. You know who never speaks unless directly called on. Trust your gut.
Write each student’s name on the colored paper slip that matches their placement.
Done.
Let the students do the work for you

On class day, I spread the colored name slips on a desk near the door (or tape them to the wall outside the door for large classes because nobody wants a traffic jam).
I tell students to grab their slip, find a seat, and make sure they’re NOT sitting with anyone who has the same color. (Or, if you need bigger discussion groups, tell them how many of each color can be in a group.)
That’s it.
They figure it out themselves while you’re setting up your presentation or greeting people or whatever you need to be doing.
Anyone who comes late? They look for a group that doesn’t have their color yet and join in. No awkward interruptions. No stopping class to assign them somewhere. No accidentally putting three high-level students in one group while a low-level student sits alone looking lost. (For the newbies, no, IEP classes aren’t a free-for-all when it comes to levels, but WITHIN each level, there are always variations.)
Your Discussion Groups Aren’t Written in Stone!
I’m not saying that this is a one and done deal. Things might need adjustment, but this system makes that easy as well!
Need to switch things up? Easy.
Now, because people get weirdly attached to their place, they’ll be heading to their discussion groups automatically because they want that same chair. (Why do we get so attached to a particular spot?!) But, after some time, groups could start getting stale. Students fall into patterns. The conversations aren’t as lively.
Simple fix: Tell everyone with yellow to switch places. Then everyone with blue switches. A piece of candy is a simple bribe that softens their unhappiness at being ripped away from their spot in their world. I mean the classroom.
Now the shy students still have one familiar person (so they don’t completely freeze up), but you’ve breathed new life into the discussion groups overall. Takes about 30 seconds. And if they need some more prodding, go with talking tickets.
Students have changed? Change the system.
As time goes on, you’ll notice shifts. That quiet student in the red category is suddenly the most talkative person in the room. Someone you thought was high-level is actually struggling more than you realized.
When you have enough changes to justify it, rework your chart and reassign colors.
Here’s the key: Use four DIFFERENT colors than before (purple, orange, pink, white…whatever). This avoids drawing attention to anyone who has changed because yeah, some of them will have figured out your system by then. With new colors, it just looks like you’re switching up the system.
Seriously, this system saved me hours of mental energy and so many awkward moments of trying to reorganize people on the fly while maintaining my “I totally have everything under control” teacher face.
Now you need something for them to discuss
You’ve got your groups sorted. They’re balanced, so nobody’s dominating, and nobody’s sitting there in painful silence.
Now what?
You could spend your evening creating discussion topics yourself. You know, if you have unlimited free time and no life outside of teaching. (Stop looking at me.)
Or you could grab some ready-to-print discussion topic cards ↗ from my TpT store and use that time to, I don’t know, eat dinner like a normal person?
Just saying.
That’s it from me. See you in the next post!