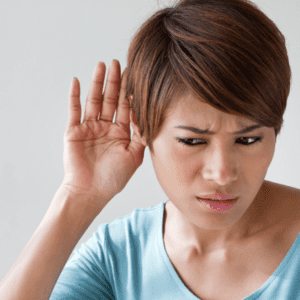

Look, we all know why we teach Short I and Long E sounds. Nobody wants their students accidentally talking about going to the “b*tch” when they mean “beach.”
I’ve watched students’ faces turn bright red when they realize what they just said. It’s either painful for their classmates or provokes irrepressible laughter, which isn’t helpful.
The problem is that drilling these sounds is mind-numbingly boring. You know it. I know it. Your students definitely know it. They’re willing to put up with it because they know pronunciation sounds matter and pronunciation drills ARE effective, but that doesn’t mean we need to rely entirely on them.
So how do we make this bearable? Better yet, how do we make it something students don’t dread?
Let’s Get Clear on Just What We’re Teaching
Before we jump into activities for short i and long e sounds, can you explain the difference between those two sounds to your students? Like, really explain it?
You probably pronounce them just fine. But explaining WHY your mouth does what it does? That’s different.

About that Short I Sound:
Think “sit,” “bit,” “hit.” It’s quick and crisp. Your tongue stays low and relaxed in your mouth. It’s a quick, clipped sound. That’s really it.
- sit: /sɪt/
- bit: /bɪt/
- hit: /hɪt/
About that Long E Sound:
Now we’re talking “seat,” “beat,” “heat.” Your tongue lifts slightly higher, and you stretch that sound out. Tell your students to smile while they say it. Seriously, the smile helps.
- seat: /sit/
- beat: /bit/
- heat: /hit/
Here’s the thing about IPA (International Phonetic Alphabet) (that /sɪt/ vs /sit/ business): it’s super useful IF your students already know it. But look at those minimal pairs. Confusing, right? That’s why I only pull out IPA when I know my students already know it. Otherwise, we’re just adding another layer of confusion with symbols that look like letters that make different sounds.
Real Talk About Teaching These Sounds
Some of your students are going to struggle with this. Their native language might not have these distinctions at all. Be patient. Like, truly patient, not “I’m smiling but dying inside” patient.
A few things that really help:
- Minimal pair practice. Show them “bit” versus “beat.” Let them hear the difference over and over. If they can’t produce the sounds yet, they might not be able to HEAR them either. Auditory discrimination matters just as much as getting their mouths to cooperate.
- Visual aids. Phonetic charts, mouth diagrams, whatever works. Some students need to SEE what their tongue should be doing.
- Repetition without the tears. This is where the activities come in. Because straight-up drilling? That’s a recipe for checking out mentally. We’ve got to keep their brains on task and noticing what’s happening in their mouths.
Now that you’ve got the basics down, let’s talk about activities that won’t make your students want to fake a bathroom emergency, something I may or may have not done as a student myself.
Four Pronunciation Activities for Short i and Long e
You’ll love how easy these are to set up and do.
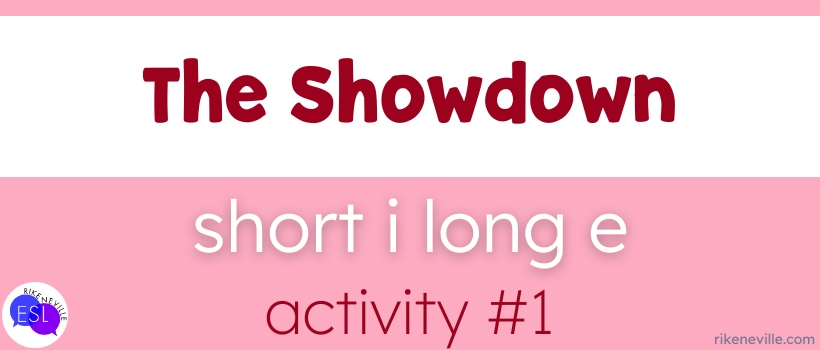
Pronunciation Activity #1: The Showdown
This is basically a competition, and adults love competitions more than they want to admit.
What you need: Flashcards with Short I and Long E words. “Ship,” “seat,” “fish,” “feet.” You get the idea.
How it works:
- Split your class into teams
- Hand out flashcards evenly
- Each team picks a card, and someone pronounces the word
- Correct pronunciation? Point earned.
- Let team members argue… I mean, discuss before deciding
- Keep going until you run out of cards
- Team with the most points wins
The beauty here? Students will care about getting it right because their TEAM cares. Peer pressure for the good of all. Er, the good of pronunciation.

Pronunciation Activity #2: Charades…kinda
Remember charades? We’re stealing that, but adding a pronunciation twist.
What you need: Picture cards or phrases with your target sounds.
How it works:
- Two teams (you know the drill by now)
- One student picks a card secretly.
- They act out or describe the word WITHOUT saying it.
- Their team guesses, using correct pronunciation.
- Right answer with right pronunciation? Point.
- Wrong sound comes out first? Sorry, turn over.
- Keep rotating until everyone’s had a turn or time runs out
This activity is messy and loud and dramatically-inclined students love it. They’re so focused on guessing the word that they forget to be self-conscious about pronunciation. Win-win.

Pronunciation Activity #3: Word Blend Challenge
Here’s where things get real. Multisyllabic words with BOTH sounds mixed in.
What you need: A list of longer words. “decided,” “repeated,” “increase,” “mislead,” “treated,” “proceeded.” (Words that are appropriate will vary according to the regional pronunciation you use.)
How it works:
- Explain what you’re doing (blending both sounds in longer words).
- Give students the list.
- Each student takes a turn pronouncing a word.
- You guide and support as they work through it.
- Celebrate when they nail it.
- Divide them into teams and have the teams take turns saying a word. If the team member pronounced it correctly the first time, they get two points. If they pronounce it correctly the second time, one point.
- Add up the points and celebrate the winner.
This one’s tough, but it’s also where you see real progress. When a student smoothly says “repeated” with both sounds correct? That’s the good stuff.

Pronunciation Activity #4: Story Time
Stories work. Adults like stories. Stories give context, and context makes pronunciation stick.
What you need: A short story loaded with Short I and Long E words. Write your own if you want, or find one that works. Writing your own is best because you can add your students to the story, and then there’s no way they’ll not pay attention.
How it works:
- Introduce the sounds with examples first.
- Read the story aloud, making those sounds VERY clear.
- Students listen and identify the sounds (they can point to SHORT I or LONG E cards, or hold up fingers, whatever keeps them accountable).
- Break into small groups, assign each group a section.
- Groups retell their section with correct pronunciation.
- Give positive feedback and constructive suggestions.
Want to extend this? Have students write their own short stories using these sounds. They’ll get weirdly competitive about cramming in as many target words as possible to the point that the story makes absolutely no sense. Let them. The plot isn’t the point; the sounds are.
The Bottom Line
Your students need to master these sounds. Not because some curriculum says so, but because confusing “beach” and “b*tch” in a professional setting is… not ideal.
These activities work because they’re NOT drilling. Students are competing, acting, storytelling, creating. They’re so busy doing the activity that they forget to be (as) nervous about pronunciation.
Try one. See what happens. Your students just might look forward to pronunciation practice.
That’s it from me. See you in the next post!
Want something made for adults?
These short a and long e minimal pair resources are available in my TpT store:
presentation & activity pack . . . | | | . . . flashcards . . . | | | . . . game
keep reading
4 Easy Long Vowel Activities for Adult ESL: Spelling Patterns & Pronunciation